How Do You Choose the Right LED Fresnel Light for a Studio?
Views: 4 Author: Site Editor Publish Time: 2026-07-01 Origin: Site


Transitioning a studio from traditional tungsten or HMI fixtures to LED technology requires balancing cinematic light quality with modern operational efficiency. Whether you are outfitting a new soundstage or upgrading an existing grid, lighting directors face a strict set of technical demands. Selecting the wrong fixture leads to inconsistent color rendering across multiple cameras. This forces expensive post-production correction and delays delivery schedules. Poorly designed units also introduce unacceptable fan noise during quiet takes, ruining audio tracks on enclosed soundstages. Furthermore, substandard fixtures often suffer from integration failures with existing studio control grids or virtual backgrounds. A systematic evaluation of optical performance, thermal management, and control protocols solves these issues. You must select a fixture that meets the aesthetic demands of cinematographers while satisfying the technical requirements of studio engineers. Proper evaluation ensures your lighting infrastructure remains versatile, reliable, and fully integrated with modern production workflows.
Color Accuracy is Non-Negotiable: Prioritize fixtures with TLCI and CRI scores above 95, specifically checking R9 (red) values to ensure accurate skin tone reproduction on digital sensors.
Match Output to Studio Scale: Select wattage based on throw distance; 40W–150W units suit small interview spaces, while 300W–350W+ units are required for medium-to-large studio grids and high-key lighting.
Prioritize Advanced Control: A professional DMX Fresnel light must offer 16-bit dimming resolution for seamless fades and support RDM (Remote Device Management) for efficient grid management.
Acoustics Matter as Much as Optics: Active cooling systems must be evaluated for decibel (dB) output to prevent audio interference on enclosed soundstages and quiet theater environments.
Adaptability Beyond Broadcast: Modern LED Fresnel lights must bridge the gap between physical sets, virtual production (VP) LED stages, and high-end portraiture photography.
Defining Studio Success Criteria for LED Fresnel Lighting
The Role of the Fresnel Lens in Modern Studios
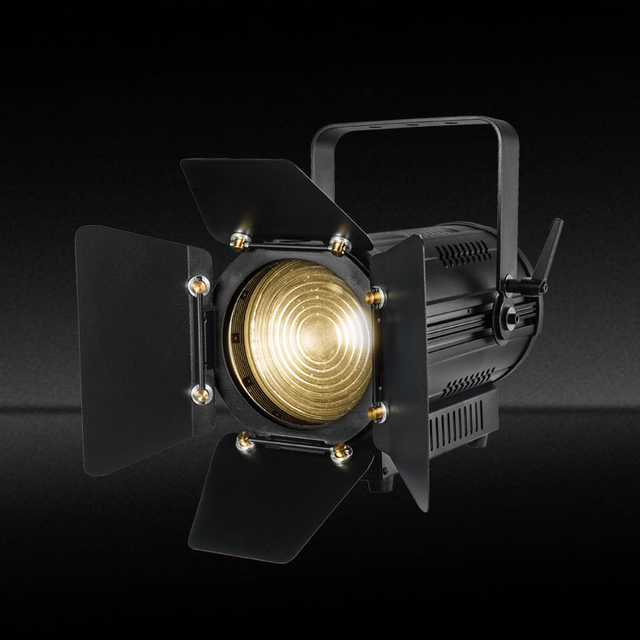
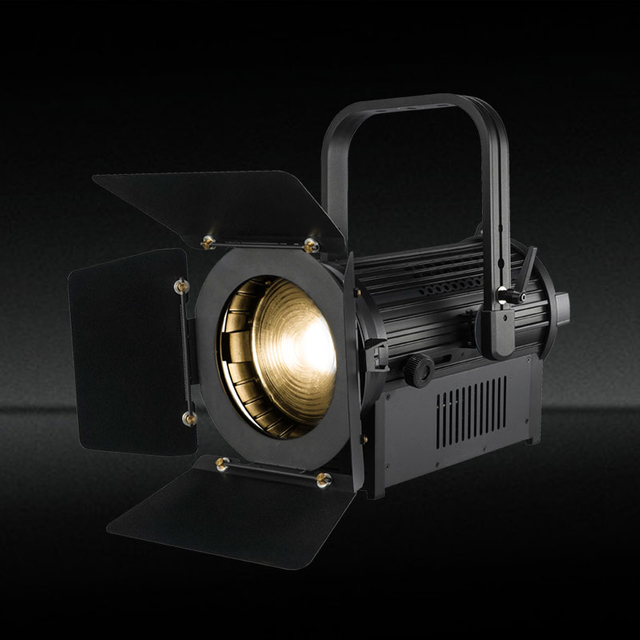
The core of a Led Fresnel Light lies in its stepped glass or high-grade polymer lens. This specific optical design shapes the raw LED source into a highly directional, hard beam. It provides a smooth, gradual falloff at the edges. The concentric rings of the lens focus the light efficiently. This maximizes output while maintaining strict beam control across the set. You get a punchy yet forgiving hard light source.
These fixtures are uniquely suited for mimicking natural sunlight streaming through a window. They create defined shadows that give depth to a scene. This makes them ideal for beauty portraits and high-contrast black-and-white setups where texture and dimension matter most. The smooth edge falloff allows multiple fixtures to blend seamlessly on a set without creating harsh overlapping lines. When you need to cut the light with barn doors, the lens design ensures the shadows remain clean and predictable.
Studio engineers rely on this predictability. When hanging a grid, knowing exactly how the light will behave at a specific distance saves hours of adjustment time. The optical clarity of the lens directly impacts the transmission efficiency. Cheaper lenses scatter light, reducing the punch and creating unwanted spill. High-quality glass ensures the maximum amount of photons reach the subject, maintaining the intensity required for lower ISO camera settings.
Assessing Studio Size, Throw Distance, and Beam Angle
Calculating required illuminance depends entirely on the distance from the grid to the subject and the camera's base ISO. You must determine the necessary lux or foot-candles to achieve proper exposure without pushing camera sensors to noisy gain levels. Larger studios require higher output fixtures to maintain adequate light levels over longer throws. A light that looks bright at ten feet might be completely useless at thirty feet.
Spot-to-flood adjustability is a mandatory feature for studio versatility. A mechanical zoom mechanism that shifts the beam angle from a tight 15-degree spot to a wide 60-degree flood impacts how you use the fixture. This adjustability allows a single light to serve as a tight key light for a specific talent mark or a broad fill for an entire news desk. You adapt quickly to different set designs and blocking requirements without swapping fixtures.
To properly plan your grid, you need to understand the relationship between beam angle and throw distance. The following table outlines typical expectations for studio setups.
| Studio Size | Typical Throw Distance | Recommended Beam Angle | Primary Application |
|---|---|---|---|
| Small Podcast/Vlog | 5 - 10 feet | 40° - 60° (Flood) | Soft key, broad fill, close-up interviews |
| Medium Broadcast | 15 - 25 feet | 25° - 45° (Mid) | News desks, multi-talent panels, standing presentations |
| Large Soundstage | 30 - 50+ feet | 10° - 20° (Spot) | Theatrical stages, deep set illumination, simulated sunlight |
Application-Specific Requirements: Broadcast, Theater, and Virtual Production (VP)
Virtual Production and LED volume stages demand real-time lighting synchronization. Physical lighting color metrics must perfectly match digital background plates. Fixtures used in these environments require precise color tuning capabilities. They need rapid response times to dynamic control signals from media servers. If the physical light lags behind the virtual environment, the illusion breaks immediately.
Theater spaces prioritize absolute fan silence and extremely long throws. They require powerful optics and superior thermal management. A noisy fan will ruin a quiet dramatic monologue. Broadcast studios prioritize remote grid control and rapid setups. News environments often rely on motorized yokes and robust integration to adjust lighting plots efficiently between different daily programs.
Each environment dictates a different rigging approach. In a theater, lights might hang from a fly system, requiring secure safety cables and heavy-duty clamps. In a broadcast studio, they often sit on a fixed pipe grid. Virtual production sets might require lights mounted on rolling stands for rapid repositioning as the camera tracks. Understanding your specific application ensures you select a fixture with the correct physical and operational characteristics.
Core Evaluation Dimensions: Technical Specifications
Color Temperature and Spectral Accuracy
Choosing the right color temperature depends on your primary shooting environment. Daylight-balanced 5600K fixtures excel in studios matching exterior windows. Tungsten-balanced 3200K units match traditional theatrical setups and practical warm lamps. Bi-color and full RGBWW fixtures offer maximum flexibility. They allow precise color matching without the use of physical gels, saving time during rapid set changes.
Standard CRI metrics often fall short for modern digital sensors. You must evaluate TLCI, TM-30, and SSI for true digital sensor compatibility. These advanced metrics provide a more accurate representation of how the light will render skin tones and complex colors on camera. A high CRI does not guarantee a high TLCI. Always check the specific R9 value, which dictates how well the light reproduces reds, a critical component of human skin tones.
When evaluating spectral accuracy, consider how the light interacts with your specific camera sensors. ARRI, RED, and Sony sensors all interpret color slightly differently. A fixture that looks perfect to the eye might show a slight green shift on a monitor. High-end fixtures allow for plus/minus green adjustment. This feature is mandatory when mixing LED sources with older fluorescent practicals or when shooting through tinted studio windows.
Power Output and Photometric Performance
Translating LED wattage to traditional tungsten equivalents helps set realistic output expectations for older gaffers. A 150W LED often rivals a 650W tungsten fixture. A 350W LED can replace a 1K or 2K tungsten unit depending on the lens efficiency. However, wattage alone does not dictate actual brightness. You must look at the actual photometric data provided by the manufacturer.
Read manufacturer photometric charts carefully. Focus on center lux ratings versus edge falloff at various beam angles. A fixture might measure exceptionally bright in the center of a tight spot but lose intensity rapidly when flooded out. Consistent output across the beam spread is vital for even illumination. If the light has a hot spot in the center, it will overexpose the subject's face while leaving their shoulders in shadow.
Testing output requires a reliable light meter. When evaluating a new fixture, measure the lux at ten feet in full spot, medium, and full flood. Then, walk the meter to the edge of the beam to check the falloff gradient. A high-quality lens will show a smooth, linear drop in intensity. A poor lens will show sudden drops or weird color fringing at the edges. Always base your purchasing decisions on measured photometric performance, not marketing claims.
DMX Integration and Dimming Curves
Professional grid integration requires robust control protocols. A reliable DMX Fresnel light utilizes 5-pin DMX512 in/out ports rather than 3-pin configurations. This ensures compatibility with standard theatrical and broadcast infrastructure. 5-pin cables prevent accidental cross-patching with audio equipment and provide a more secure physical connection in the grid.
The difference between 8-bit and 16-bit dimming is critical for professional work. 16-bit dimming provides 65,536 steps of intensity. This prevents visible stepping or popping at the bottom ten percent of the dimming curve. When executing a slow theatrical fade to black, 8-bit dimming will stutter and drop off suddenly. 16-bit dimming ensures a perfectly smooth transition all the way to zero.
Wireless DMX protocols, such as LumenRadio CRMX, offer dynamic control for remote or hard-to-reach rigging scenarios. This streamlines the setup process. You can patch and control fixtures without running hundreds of feet of data cable. However, wireless systems require careful frequency management to avoid interference from studio Wi-Fi networks and wireless microphones. Always have a hardwired backup plan for live broadcasts.
Operational Realities and Implementation Risks
Thermal Management and Acoustic Performance
High lumen output in LED COB engines generates significant heat. Effective thermal management is necessary to maintain color consistency and prolong the lifespan of the LED chip. Poor heat dissipation leads to color shift over long shooting days and premature fixture failure. The heat sink design must efficiently pull thermal energy away from the diode array.
Fan noise poses a severe risk on soundstages. You must evaluate passive cooling heat sinks versus ultra-quiet, variable-speed active cooling fans. Fixtures should offer silent modes or fan-off settings for critical audio recording. Sometimes this means temporarily capping the maximum light output to prevent overheating. A loud fan will render a powerful light completely unusable during an intimate dialogue scene.
When testing acoustic performance, place the fixture three feet from a boom microphone in a quiet room. Run the light at full intensity for thirty minutes to ensure the fans reach maximum speed. Listen for high-pitched whining or bearing rattles. A low-frequency hum is often easier to remove in post-production than a high-frequency whine. Prioritize fixtures with large, slow-spinning fans over small, high-speed fans.
Flicker-Free Performance for High-Speed Production
PWM frequencies dictate a light's performance on camera. If the PWM frequency is too low, the camera sensor will capture banding or flicker, ruining the footage. This happens because the LED is actually turning on and off thousands of times per second to control brightness. If this cycle syncs poorly with the camera's shutter speed, you get rolling dark bands across the image.
Establish a baseline PWM frequency required to avoid these issues. High-speed production or varying shutter angles demand fixtures with ultra-high PWM frequencies. These often exceed 20,000 Hz to ensure perfectly clean frames under any shooting condition. When shooting slow motion at 120 frames per second or higher, standard fixtures will almost always flicker. You need specialized high-frequency drivers.
Always test fixtures with your specific camera package before a major shoot. Set the camera to the highest frame rate and narrowest shutter angle you plan to use. Record a test clip while dimming the light from 100 percent down to 1 percent. Flicker often appears only at specific dimming levels. A light that is flicker-free at full power might show severe banding at 20 percent intensity.
Build Quality, Rigging, and Form Factor
The structural integrity of the yoke design and locking mechanisms is paramount for safety and precision. The fixture must hold its position securely, especially when rigged high in a grid. A slipping yoke will ruin a carefully focused lighting plot. Compatibility with standard studio rigging, such as junior pins or baby pins, ensures seamless integration with your existing grip equipment.
Evaluate the durability of the chassis. Aluminum construction generally offers better heat dissipation and ruggedness compared to composite materials. Plastic housings crack easily when bumped by ladders or heavy stands. Robust accessory mounts are necessary to support heavy barn doors, gel frames, and softboxes without sagging or failing during operation.
Proper rigging requires a systematic approach to ensure safety on set. Follow these steps when hanging a new fixture:
Inspect the mounting clamp and safety cable for any signs of wear or damage before lifting the fixture.
Secure the clamp to the grid pipe, ensuring the bolt is tightened to the manufacturer's specified torque.
Attach the safety cable by looping it over the grid pipe and securing it to the designated safety ring on the fixture chassis.
Connect the power and data cables, leaving enough slack in the lines to allow for full pan and tilt movement.
Open the barn doors and perform a test strike to verify operation before moving on to the next fixture.
Value Factors and Ecosystem Compatibility
Ecosystem and Accessory Compatibility
Standard accessory mounts allow you to utilize existing studio modifiers. This compatibility prevents the need to purchase entirely new sets of light shaping tools when upgrading fixtures. If your studio already owns dozens of softboxes, snoots, and grids, ensuring your new lights accept these modifiers is critical. Proprietary mounts lock you into a single manufacturer's ecosystem, limiting your options and flexibility.
Consider the availability of motorized yokes. These allow for rapid pan and tilt adjustments from the studio floor using a standard operating pole or a lighting console. This feature drastically reduces setup times in high-ceiling broadcast studios where ladder access is impractical or unsafe. Motorized control allows a single operator to refocus an entire grid in minutes rather than hours.
Integration with existing studio software is another major factor. The fixtures must communicate flawlessly with your lighting console. Check for updated fixture profiles in your console's library. If the manufacturer does not provide accurate DMX profiles, your programmers will waste hours building custom profiles from scratch. Seamless ecosystem integration ensures the lights work for you, rather than creating additional technical hurdles.
Conclusion
Selecting the optimal lighting fixture demands careful consideration of both optical precision and technical reliability. To ensure a successful studio upgrade, follow these actionable steps:
Audit your current studio throw distances to determine the exact wattage and lux requirements needed for your specific grid height.
Request photometric data and TLCI scores from manufacturers to verify color accuracy and beam consistency before purchasing.
Test fixtures on your soundstage to evaluate fan noise levels and ensure they meet your audio recording thresholds.
Verify DMX compatibility and 16-bit dimming capabilities with your existing lighting console to guarantee smooth operational integration.
FAQ
Q: What is the main advantage of a Fresnel lens over an open-face LED?
A: A Fresnel lens shapes the light into a highly directional beam with smooth, gradual edge falloff. This allows for precise shadow control and seamless blending between multiple fixtures, which open-face lights cannot achieve as cleanly.
Q: How do I know if a light is truly flicker-free?
A: Look for fixtures that specify a high PWM frequency, typically above 20,000 Hz. Testing the light on camera at high frame rates and various shutter angles while dimming the intensity is the best way to confirm performance.
Q: Why is 16-bit dimming necessary for studio lighting?
A: 16-bit dimming provides over 65,000 steps of intensity control. This ensures completely smooth fades to black without any visible stepping or sudden drops in light output, which is critical for theatrical and broadcast transitions.
Q: Can I use standard gels with LED fixtures?
A: Yes, most LED fixtures run cool enough to use standard theatrical gels without melting them. However, utilizing RGBWW or Bi-color fixtures often eliminates the need for physical gels entirely.
Q: What does TLCI measure that CRI does not?
A: TLCI specifically measures how a light source renders colors on a digital camera sensor, whereas CRI measures color rendering based on human vision. TLCI is much more relevant for broadcast and film production.