What Is the Difference Between a Mini LED Profile Spotlight and a Fresnel Light?
Views: 3 Author: Site Editor Publish Time: 2026-08-25 Origin: Site


The shift toward compact, high-efficiency LED fixtures forces lighting designers, videographers, and stage managers to re-evaluate rigging strategies. Choosing between hard-edge and soft-edge luminaires for studio and location shoots dictates the visual outcome of your project. Selecting the wrong fixture type for a specific throw distance, subject application, or power constraint creates immediate problems. You will face uncontrollable light spill, harsh shadows, or washed-out backgrounds. These issues compromise production quality and waste valuable setup time on redundant light modifiers.
This guide deconstructs the optical mechanics, beam control capabilities, and implementation realities of hard-edge and soft-edge fixtures. We establish an evidence-based framework for your next equipment investment. You will learn exactly how physical lens structures manipulate light output. We compare flat-field projection against Gaussian beam blending. By understanding these core differences, you can specify the exact fixture required to execute your lighting plot without guesswork.
- A Mini LED Profile Spotlight utilizes a complex lens system and internal shutters to deliver a hard-edged, precisely shaped beam ideal for subject isolation and pattern projection.
- An LED Fresnel Light utilizes a stepped, concentric lens to produce a soft, easily blendable wash with adjustable spot-to-flood capabilities, optimal for general illumination and set lighting.
- While Fresnel fixtures offer broader versatility for quick wash adjustments, profile spotlights provide unmatched control over light spill and beam geometry in confined rigging spaces.
- For location filmmaking and videography, both mini profiles and small Fresnels offer significant advantages in portability and battery operability compared to traditional tungsten units.
Core Optical Mechanics: How Each Fixture Shapes Light
Understanding physical lens structures allows you to predict how light behaves at varying throw distances. The optical train defines the fixture's fundamental purpose on set. You cannot force a fixture to perform outside the boundaries of its physical glass elements.
The Anatomy of a Profile Spotlight
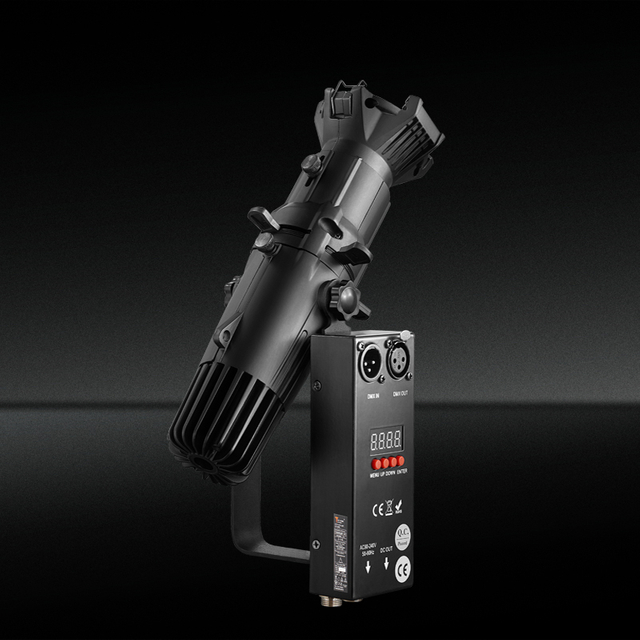
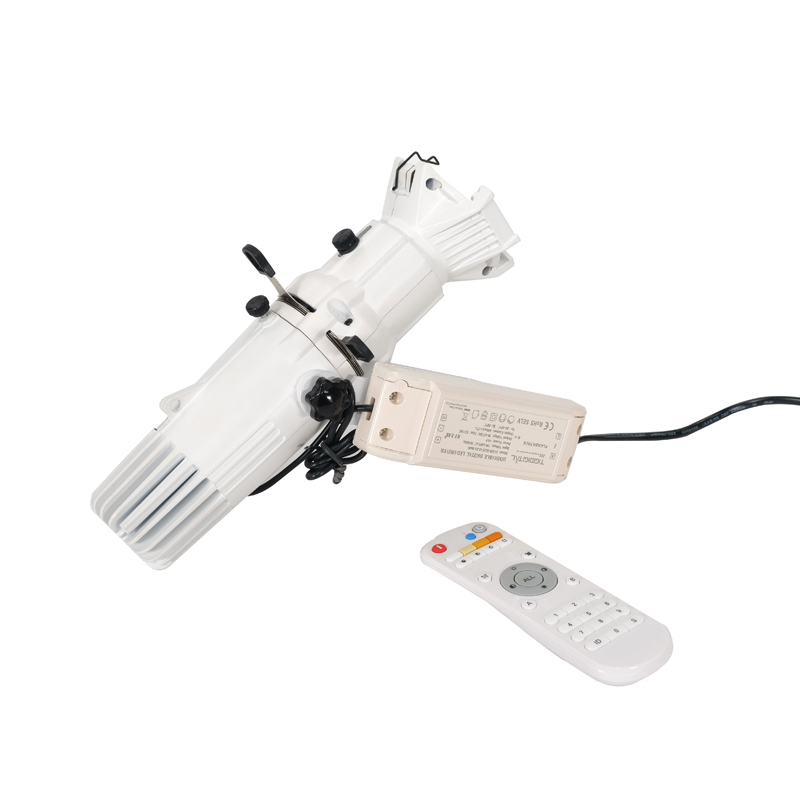
A profile fixture relies on a plano-convex or bi-convex lens train. This configuration gathers photons from the LED source and focuses them into a sharp, uniform field of light. The internal mechanics create a specific focal point. Light travels from the LED engine through a reflector and hits the internal focal plane. You insert framing shutters, irises, and gobos exactly at this plane. The front lens barrel then projects a sharp image of whatever intersects that focal plane.
The physical distance between the focal plane and the front lens determines the beam angle. You slide the lens barrel forward or backward to achieve a hard edge or a soft edge. When you push the lens barrel out of focus, you introduce chromatic aberration. This appears as a blue or orange fringe around the edge of the beam. A Mini LED Profile Spotlight leverages this exact optical efficiency. It shrinks the traditional theatrical profile into a compact footprint suitable for galleries, small studios, and architectural installations.
Modern LED engines maintain high output through these complex optical paths. They do this without generating the extreme heat associated with traditional tungsten halogen profiles. You can handle the fixture housing during operation without heavy leather gloves. You can also use standard plastic gels or printed transparency gobos without melting them onto the glass.
The Anatomy of a Fresnel Light
The Fresnel lens features concentric glass rings. These rings refract light while significantly reducing the glass mass and heat retention of a standard convex lens. The physics behind this design allow the fixture to output a highly directional beam with naturally soft edges. The back of the glass lens features a pebbled or stippled texture. This texture scatters the light slightly before it exits the fixture, breaking up the harshness of the raw LED diode.
Inside the fixture housing, an internal sled mechanism mounts the LED COB (Chip on Board). A mechanical worm gear or push-pull knob moves this sled closer to or further from the lens. Moving the LED closer to the lens floods the beam, creating a wide wash. Moving the LED away from the lens spots the beam, creating a narrow, intense pool of light. An LED Fresnel Light replicates this classic cinematic behavior while drawing a fraction of the electrical power.
You must account for the inverse square law when operating a Fresnel. When you flood the beam, the light spreads over a larger area, and the intensity drops significantly. When you spot the beam, the photons concentrate into a tight circle, spiking the lux output. You use this mechanical spotting feature to punch light through heavy diffusion silks or bounce it off distant ceilings.
Beam Quality and Edge Control: Feature-to-Outcome Evaluation
You must match the fixture's photometric output and edge characteristics to the specific visual requirements of your production. Beam quality dictates how light interacts with your subject and the surrounding environment. You evaluate fixtures based on their field distribution and edge definition.
Hard-Edge Precision and Geometry
Profile fixtures excel at hard-edge precision. You use the internal framing shutters to cut light sharply off scenery, projection screens, or architectural elements. If a speaker stands next to a projection screen, you shutter the light precisely to illuminate the speaker while keeping the screen completely dark. This prevents washed-out presentations and maintains high contrast ratios on camera.
Profiles deliver a flat field characteristic. The light intensity remains even across the entire diameter of the beam. You do not see a hot spot in the center. If you measure the beam with a light meter, the center might read 1000 lux, and the extreme edge will read 950 lux. This even distribution makes profiles mandatory for pattern projection. You insert a metal or glass gobo to project window slashes, foliage textures, or corporate logos onto a background. The flat field ensures the projected image remains crisp and uniformly bright from edge to edge.
Soft-Edge Blending and Wash
Fresnel fixtures produce a Gaussian beam profile. The light intensity peaks in the center and smoothly tapers off at the edges. If you measure a Fresnel beam, the center might read 1000 lux, while the edge drops to 200 lux. This gradual falloff provides a distinct operational advantage. You can overlap multiple Fresnel beams to create a seamless, shadow-free wash across a stage or studio set. The soft edges blend together naturally. Actors can walk across the stage without passing through visible hot spots or dark dips in illumination.
You shape a Fresnel beam using external barndoors. Barndoors block light from hitting unwanted areas. However, they cannot create sharp lines. Because the barndoors sit outside the focal plane of the lens, they create soft, feathered cuts. You use barndoors to control general spill, flag light off the camera lens, or protect the audience's eyes. You never use a Fresnel when you need a precise geometric shape.
Optical Characteristics Comparison
| Optical Feature | Profile Spotlight | Fresnel Light |
|---|---|---|
| Beam Edge Definition | Hard, sharp, defined | Soft, feathered, blended |
| Beam Shaping Tool | Internal framing shutters | External barndoors |
| Pattern Projection | Supports metal and glass gobos | Incapable of projection |
| Field Distribution | Flat field (even intensity) | Gaussian field (center peak) |
| Focus Mechanism | Moving lens barrel (focal plane) | Moving LED COB (internal sled) |
Application Framework: Which Fixture Fits Your Rig?
Aligning fixture capabilities with standard industry use cases ensures efficient rigging and optimal lighting design. Different scenarios demand specific beam characteristics. You must evaluate the physical space, the subject's movement, and the camera's position before pulling a fixture from the case.
Front Lighting and Subject Isolation
Front lighting often presents a dilemma. You need to illuminate the subject without spilling light onto the background. A profile spotlight solves this for stationary subjects. You focus the beam on a podium speaker, a museum artifact, or a product display. You shutter the edges perfectly to isolate the subject. The background remains dark, creating high contrast and visual drama. You eliminate the need for external flags and C-stands, saving floor space.
For moving subjects, a Fresnel serves as the better key light. The wider, softer, and more forgiving field prevents the actor from stepping out of the light. If the subject leans forward or shifts side to side during an interview, the Gaussian beam profile maintains flattering illumination without harsh drop-offs. You wrap the light around the subject's face, filling in wrinkles and creating a natural catchlight in the eyes.
Set Washes, Backlighting, and Fill
The Fresnel remains the industry standard for hair lighting and backlighting. Its natural wrap-around quality produces soft shadows. It separates the subject from the background without looking artificial. You can flood the lens to create a broad fill light that lifts ambient exposure across the entire set. You bounce the flooded beam off a white foam core board to create a massive, ultra-soft source for beauty lighting.
You use a profile spotlight for high-contrast, dramatic backlighting. You can create a tight halo effect around a subject's head. By using the internal shutters, you prevent the backlight from spilling directly into the camera lens, avoiding unwanted lens flares. You also use profiles to rake light across textured walls, highlighting brickwork or architectural details without washing out the entire surface.
Location Filmmaking and Portable Videography
Indie filmmaking and location videography impose severe space and weight restrictions. Mini fixtures have revolutionized this workflow. You no longer need heavy combo stands and large gas generators. A small Fresnel serves as an ideal, highly adaptable key light for corporate interviews. You can spot it up to punch through a diffusion silk, or flood it to bounce off a low ceiling.
Conversely, a mini profile acts as a precision tool for practical effects. You can hide it in a corner to project a subtle window blind pattern on a blank office wall. You can use it for tight product shots, highlighting a specific label or feature without illuminating the surrounding table. The compact size allows you to rig the fixture inside practical lamps or behind small set dressings.
Confined Spaces and Low Ceilings
Low-clearance studios, podcast rooms, and small theatrical grids require compact physical footprints. Large fixtures hang too low, entering the camera frame or radiating heat onto the talent. Mini profiles and small Fresnels mount easily on low pipe grids or drop-ceiling scissor clamps. You must follow a strict process when rigging in these environments to maximize headroom.
- Attach a scissor clamp securely to the metal T-bar of the drop ceiling.
- Mount a baby pin adapter to the scissor clamp, ensuring the locking screw faces away from the talent.
- Slide the fixture's yoke onto the baby pin and tighten the receiver knob.
- Attach a steel safety cable around the fixture yoke and loop it over a structural ceiling support, bypassing the drop ceiling grid entirely.
- Route the power and DMX cables along the grid lines, securing them with gaffer tape or cable ties to prevent sagging.
- Power on the fixture and adjust the pan and tilt before locking down the yoke handles.
Scalability, Power, and Technical Compliance
Assessing the electrical and control infrastructure required to support these fixtures prevents on-set failures. Modern LED technology introduces specific technical variables you must evaluate. You cannot simply plug a fixture into a wall and expect broadcast-quality results.
LED Efficiency, CRI, and Thermal Management
Broadcast and film applications demand high color accuracy. You must evaluate the Color Rendering Index (CRI), the Television Lighting Consistency Index (TLCI), and TM-30 metrics. High ratings (95+) ensure skin tones look natural and set colors render accurately on camera. Poor color rendering requires extensive post-production color correction, costing time and money. You must also check for green/magenta shifts, as cheap LED diodes often skew green.
Thermal management impacts audio recording. Compact fixtures use either active fan cooling or passive heat sinks. Passive cooling generates zero noise, making it ideal for quiet interview rooms and foley stages. Active cooling allows higher light output but introduces a noise floor. You must verify that fan noise remains undetectable by your boom microphones. High-end fixtures offer fan control modes, allowing you to limit the fan speed or turn it off entirely at the cost of reduced light output.
Power Draw and Battery Operability
Low power draw offers a massive logistical advantage. You can run dozens of mini LED fixtures on a single standard 15-amp household circuit. This eliminates the need for heavy power distribution boxes, thick feeder cables, and dedicated generator operators. You calculate your total amperage by dividing the total wattage by the voltage (e.g., 1000 watts / 120 volts = 8.3 amps).
DC power capabilities enable remote location shoots. Many compact fixtures run on V-Mount, Gold Mount, or NP-F batteries. You can rig a light in a forest, an abandoned building, or the back of a moving vehicle. Battery operability removes cable trip hazards on fast-paced sets. You must calculate your runtime based on the battery's watt-hour (Wh) rating and the fixture's maximum power draw.
Estimated Battery Runtime for 20W Fixtures
| Battery Type | Capacity (Watt-Hours) | Estimated Runtime at 100% Output |
|---|---|---|
| NP-F550 | 15 Wh | 45 Minutes |
| NP-F970 | 63 Wh | 3 Hours |
| 14.8V V-Mount (Mini) | 50 Wh | 2.5 Hours |
| 14.8V V-Mount (Standard) | 98 Wh | 4.5 Hours |
DMX Control and Dimming Curves
Theatrical fade-outs require smooth, 16-bit dimming. You need absolute control at the bottom end of the dimming curve (0-10%). Lower-tier fixtures often exhibit visible stepping or snapping when fading to black. High-quality LED drivers ensure a seamless transition from low light to complete darkness. You select the appropriate dimming curve (linear, exponential, logarithmic, or S-curve) based on the specific fade requirements of the scene.
Standard DMX channel profiles vary. Basic fixtures use a single channel for intensity. Advanced fixtures utilize multiple channels to control intensity, color temperature, green/magenta shift, and strobe effects. You must ensure your lighting console supports the required DMX footprint. You also need to verify if the fixture supports RDM (Remote Device Management), which allows you to change DMX addresses and monitor fixture temperatures directly from the console.
Conceptual Trade-Offs and Implementation Risks
Balancing versatility against specialized performance requires understanding the inherent trade-offs of each fixture type. No single light solves every problem. You must anticipate the rigging challenges and technical limitations before arriving on set.
Versatility vs. Specificity
A Fresnel light functions as a generalist tool. You deploy it quickly. You adjust the beam spread in seconds. You throw on a gel and rough in the barndoors. It gets the job done fast. However, it remains incapable of sharp cuts or pattern projections. It lacks surgical precision. You sacrifice control for speed.
A profile spotlight functions as a specialist tool. It requires more time to rig and focus. You must adjust the lens barrel, insert the gobo, and dial in the framing shutters precisely. The setup takes longer, but the fixture offers unmatched control over the final image. You sacrifice speed for absolute precision.
Implementation Risks and Mitigation
Dimming lower-tier LED fixtures often causes color shift or flickering on camera. The camera sensor picks up the pulse rate of the LED driver, resulting in rolling black bands across the footage. You mitigate this risk by specifying fixtures with adjustable PWM (Pulse Width Modulation) frequencies. High PWM frequencies (above 20,000 Hz) eliminate flicker on high-speed or standard frame rates. You should also look for constant-current LED drivers to maintain color temperature during deep dimming.
Miscalculating throw distance represents another common risk. If you guess the distance, your profile beam might be too small to cover the subject. Your Fresnel beam might lack the punch to reach the stage. You mitigate this by mandating the review of manufacturer photometric charts prior to procurement. Check the lux output at specific meters. Match the beam angle to your architectural blueprints or studio grid height.
Throw Distance and Lens Selection Guide
| Throw Distance | Recommended Profile Lens Degree | Recommended Fresnel Setting |
|---|---|---|
| 1 - 3 Meters | 36° or 50° | Full Flood |
| 3 - 6 Meters | 26° or 36° | Mid-Spot |
| 6 - 10 Meters | 19° or 26° | Full Spot |
| 10+ Meters | 5° or 10° | Not Recommended |
Conclusion
- Audit your current rigging plot to identify specific areas suffering from uncontrollable light spill, harsh shadows, or inadequate subject isolation.
- Measure the exact throw distances from your lighting grid to the primary subject marks to determine the necessary lens degrees and beam angles.
- Request photometric data charts from manufacturers to verify the exact lux output, CRI ratings, and PWM frequencies at your specific operating ranges.
- Test physical demo units on set to validate fan noise levels, dimming curve smoothness, and battery plate compatibility in your actual production environment.
FAQ
Q: Can a profile spotlight be used as a wash light?
A: Yes, but it is not optimal. You can throw the lens out of focus to soften the hard edge. You can also insert heavy diffusion gels into the color frame. However, the flat field characteristic makes blending multiple profile beams difficult compared to the natural Gaussian falloff of a Fresnel.
Q: Do Fresnel lights support gobo projection?
A: No. Fresnel lenses do not have an internal focal plane capable of projecting sharp images. The pebbled glass naturally diffuses light. If you place a gobo in front of a Fresnel, you will only get a blurry, unrecognizable shadow on the background.
Q: What causes color shift when dimming LED fixtures?
A: Color shift occurs when cheap LED drivers reduce voltage to dim the light. High-quality fixtures use constant-current drivers and advanced Pulse Width Modulation (PWM). This maintains the exact color temperature and CRI rating even when the fixture is dimmed down to one percent.
Q: How do I choose the right lens degree for a profile fixture?
A: You must measure the throw distance from the fixture to the subject. You then determine the required beam diameter at that distance. Use the manufacturer's photometric charts to match the distance and diameter to the correct lens degree, such as 19°, 26°, or 36°.
Q: Are barndoors effective for sharp light cuts?
A: No. Barndoors sit outside the optical focal plane of the fixture. They create soft, feathered shadows. You use them to control general spill and flag light off camera lenses. For sharp, precise cuts, you must use a profile fixture with internal framing shutters.
Q: Can I power these compact fixtures with standard camera batteries?
A: Many compact LED fixtures feature DC inputs. They often support V-Mount, Gold Mount, or NP-F battery plates. You must check the fixture's maximum power draw against the battery's output capacity to ensure compatibility and calculate accurate runtime for your location shoots.